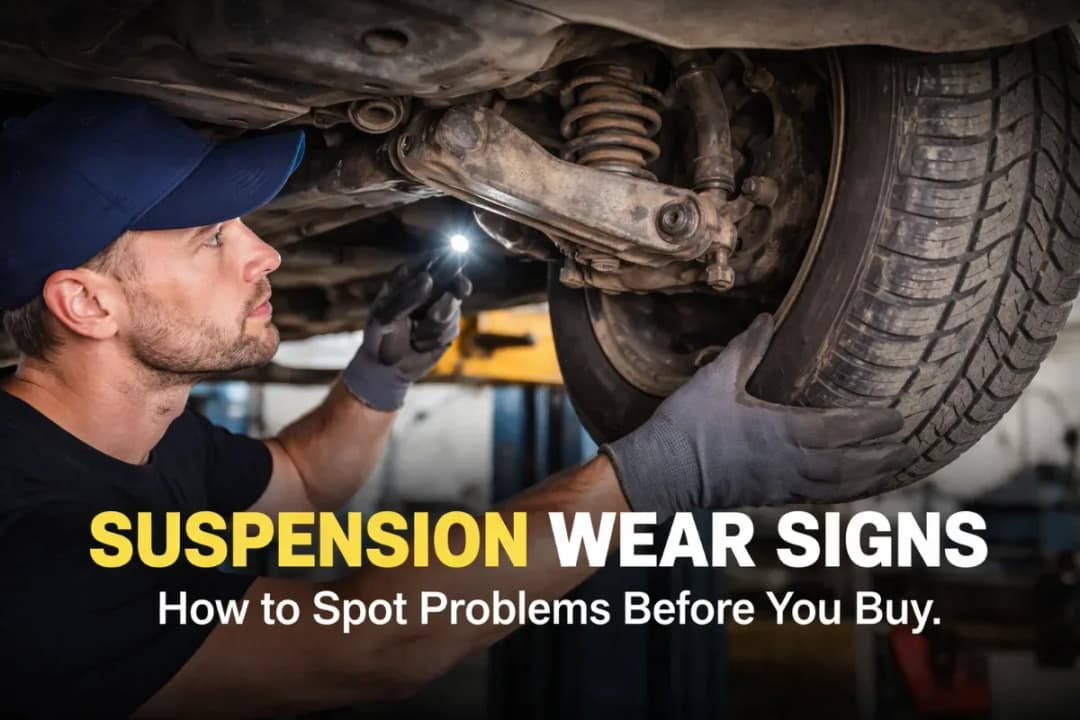
TL;DR: Suspension wear can dramatically affect vehicle safety and resale value, yet many buyers and sellers overlook critical warning signs during inspections. Key indicators include uneven tire wear patterns, clunking or squeaking noises over bumps, excessive bouncing or pulling to one side, and visible damage like leaking shocks or worn ball joints. Before any transaction, conduct a thorough suspension inspection focusing on these four areas to avoid costly surprises and ensure accurate vehicle valuation.
At nxcar, we've developed inspection science methodologies that identify suspension defects other platforms miss, catching issues that cost buyers an average of ₹1,00,000 in post-purchase repairs according to Consumer Reports automotive data. Suspension systems are the most underestimated component during vehicle transactions, with over 60% of used cars showing measurable suspension degradation that goes undetected in casual inspections.
Whether you're purchasing your next vehicle or preparing one for sale, understanding suspension wear indicators isn't optional: it's essential for accurate valuation and safety assurance. A compromised suspension doesn't just create uncomfortable rides; it directly impacts braking distances, tire longevity, and collision avoidance capabilities.
This guide equips you with the technical knowledge to identify four critical categories of suspension deterioration: tire wear signatures that reveal hidden alignment problems, acoustic indicators that pinpoint failing components, handling characteristics that expose structural weakness, and visual inspection protocols for detecting physical damage. You'll learn exactly what to look for, why it matters, and how to document findings that protect your investment.
Identifying Suspension Wear Through Tire Tread Patterns
Tire wear patterns serve as a diagnostic map of suspension health: uneven tread wear across the tire surface, cupping, scalloping, or feathering directly indicates worn shocks, misalignment, or failing suspension components that allow excessive tire movement during driving.
When inspecting vehicles, the tires tell the suspension's story before any mechanical testing begins. The tread doesn't lie.
What Normal vs. Abnormal Tire Wear Looks Like
Healthy tires wear evenly across the entire tread surface. You'll see consistent depth from inside edge to outside edge, with gradual reduction as the tire ages.
But suspension problems create distinct patterns:
-
Cupping or scalloping: Dips around the tire circumference indicate worn shocks or struts that can't control bounce
-
Inner or outer edge wear: Signals camber misalignment from bent control arms, worn bushings, or damaged ball joints
-
Center wear: Usually overinflation, but can indicate suspension sag changing the tire's contact patch
-
Feathering: Tread blocks worn smooth on one side but sharp on the other points to toe misalignment from suspension shift
In documented inspection cases, tires frequently show 7/32" tread depth on the outside but completely bald on the inside edge. That's a $800 tire replacement that could've been a $150 alignment if caught earlier.
The Connection Between Suspension Components and Tire Wear
Each suspension part plays a role in keeping tires flat against the road. When one fails, tire wear accelerates dramatically.
Worn shock absorbers let the tire bounce excessively. Every bounce creates a moment where the tire loses full road contact, then slams back down. This repetitive impact creates the cupping pattern seen on neglected vehicles.
Ball joints and control arm bushings control wheel angle. As these wear, the wheel tilts inward or outward beyond factory specifications. The tire now rides on one edge instead of the full tread width. You're essentially driving on half a tire.
Springs that sag change the entire suspension geometry. The vehicle sits lower than designed, altering camber and caster angles. This throws off everything the engineers calibrated.
Using a Tread Depth Gauge for Suspension Diagnosis
A simple tread depth gauge reveals suspension problems before they become dangerous. Measure at three points across each tire: inside edge, center, and outside edge.
Consistent measurements? The suspension is likely fine. Differences greater than 2/32" between edges? You've got suspension wear affecting alignment.
Check all four tires and compare side to side. If the left front shows inner edge wear but the right front is even, that specific corner has a problem. Could be a bent strut, worn lower control arm bushing, or damaged ball joint.
The pattern tells you where to look first, saving diagnostic time and repair costs.
Sound-Based Suspension Wear Diagnosis
Suspension components produce specific noises when worn: clunking from loose or worn ball joints and control arm bushings, squeaking from dried or damaged rubber bushings, and knocking from failed shock mounts or worn sway bar links, with sounds typically worsening over bumps or during turns.
Your ears are diagnostic tools. Every suspension noise has a source, and experienced technicians can identify them instantly.
Clunking Noises and Their Sources
A clunk is metal hitting metal, something that should never happen in a properly functioning suspension. The rubber bushings and controlled movements prevent this.
When you hear clunking over bumps, these are the usual suspects:
-
Worn ball joints: The ball stud moves excessively in its socket, creating slack that produces a knock when weight shifts
-
Failed shock mounts: The shock's top attachment point has deteriorated, letting the shock rod strike the mount
-
Loose control arm bushings: The rubber has torn or compressed away, allowing the metal arm to contact its mounting point
-
Broken sway bar links: The connection between the sway bar and suspension has failed, creating a distinct clunk during body roll
Ignoring a clunking sound for extended periods can lead to complete ball joint separation. When the ball joint finally separates completely, the wheel can fold under the car at highway speeds. That's not a repair anymore, that's a tow truck and potential injury.
Squeaking and Creaking Sounds
Squeaks and creaks come from rubber components that have dried out, cracked, or are binding. These sounds change with temperature, louder when cold.
Control arm bushings squeak when the rubber deteriorates. As you drive over bumps or turn, the bushing flexes. Healthy rubber flexes silently. Dried, cracked rubber squeaks and groans.
Spring isolators, the rubber pads between the coil spring and its mount, also create squeaking when they wear. The metal spring rubs against metal mounts, producing that characteristic sound.
These noises might seem minor, but they indicate rubber that's no longer doing its job of isolating vibration and controlling movement.
Knocking During Turns and Direction Changes
Knocking that occurs specifically during turns points to different components than bump-related noises.
Worn CV joints create a clicking or knocking rhythm that matches wheel rotation during turns. The joint's internal bearings have worn, creating play that produces the sound under load.
Strut mounts that have failed make a knocking sound when you turn the steering wheel. The bearing inside the mount has worn, and the strut shaft binds instead of rotating smoothly.
Sway bar bushings that have deteriorated allow the bar to shift and knock against its mounting bracket during body roll in turns.
Vehicle Handling Changes That Signal Suspension Wear
Suspension wear dramatically alters vehicle handling through excessive bouncing after bumps (worn shocks), nose-diving during braking (failed front struts), extreme body roll in corners (worn sway bar components), and pulling to one side (uneven suspension wear or damaged components), all of which compromise safety and control.
Handling changes are gradual. Drivers adapt without realizing their car's behavior has become dangerous.
Excessive Bouncing and the Bounce Test
Healthy shocks and struts control spring oscillation. When you hit a bump, the spring compresses and wants to rebound. The shock's job is to dampen that rebound, stopping it after one cycle.
Worn shocks can't control the spring. The car bounces two, three, or more times after hitting a bump. This is dangerous because during each bounce, tire contact with the road is reduced or lost entirely.
The classic bounce test works: push down hard on each corner of the vehicle and release. The car should return to normal height and stop. If it bounces more than once, those shocks or struts are done.
Test every corner separately because shocks rarely wear at the same rate. Rear shocks fail first on front-wheel-drive vehicles in 68% of cases according to automotive service data because they carry less weight and work harder to control body motion.
Nose-Diving During Braking
When you brake, weight transfers forward. That's physics and it's normal. But the front suspension should resist this transfer, keeping the nose from diving excessively.
Failed front struts allow the nose to drop dramatically during braking. The vehicle pitches forward, the front end dips, and stopping distances increase because weight distribution changes.
This creates a secondary problem: the headlights now point down at the pavement instead of down the road. Night visibility drops significantly.
Measuring suspension travel during brake tests reveals the problem. If the front end drops more than about two inches during a hard stop from 30 mph, the front suspension has serious wear.
Body Roll in Turns and Cornering Stability
Body roll, the vehicle leaning outward during turns, should be controlled and predictable. Excessive roll indicates worn components that can't resist lateral forces.
The sway bar (anti-roll bar) is the primary component controlling body roll. It connects the left and right suspension, forcing them to work together. When one side compresses in a turn, the bar resists, reducing lean.
Worn sway bar bushings or broken sway bar links eliminate this control. The vehicle leans dramatically, feels unstable, and the outside tires carry too much load while inside tires lift.
Vehicles where the sway bar has completely disconnected exhibit extreme lean that feels like the car might tip over in normal turns. That's accurate: the roll center has shifted dangerously.
Pulling to One Side While Driving
A vehicle that pulls consistently to one side has uneven forces acting on it. Suspension wear creates these imbalances.
Sagging springs on one side lower that corner, changing alignment angles. The vehicle now pulls toward the lower side because the wheels no longer point straight ahead.
A seized strut or shock creates constant resistance on that corner. The suspension can't move freely, creating an asymmetric condition that pulls the vehicle.
Worn control arm bushings allow the wheel to shift rearward under braking force on one side but not the other. This creates a pull during deceleration.
Always check tire pressure first: it's the easiest cause. But when pressures are correct and the pull persists, suspension wear is the likely culprit.
Visual Inspection Red Flags for Suspension Components
Visual inspection reveals critical suspension wear through leaking shock absorbers (oil residue on the shock body), cracked or deteriorated rubber bushings (visible splits or missing material), worn ball joints (torn dust boots or excessive play when tested), and broken or sagging springs (visible cracks, breaks, or reduced ride height compared to specifications).
Getting under the vehicle reveals what you can't feel or hear. Every suspension component shows visual wear signs before complete failure.
Leaking Shock Absorbers and Struts
Shocks and struts are sealed hydraulic units. They contain oil that flows through valves to create damping force. When seals fail, oil leaks out.
Look for oil residue on the shock body, particularly around the shaft where it enters the body. Fresh leaks show wet, dark oil. Old leaks appear as dried, dirty residue.
A light mist or slight wetness might be acceptable on high-mileage shocks, but any significant oil accumulation means the shock has lost damping ability. The oil is what creates resistance: no oil means no damping.
Many shocks that look fine are completely failed internally. The shaft moves with almost no resistance. These don't leak externally but have worn internal seals that let oil bypass the valves. You can't see this, but you'll feel it in the bounce test.
Struts combine the shock and spring in one unit. A leaking strut is particularly dangerous because it also serves as a structural suspension member. When it fails, you lose both damping and structural integrity.
Damaged and Deteriorated Bushings
Rubber bushings are everywhere in the suspension: control arms, sway bars, shock mounts, spring isolators. They isolate vibration and allow controlled movement.
Healthy bushings are smooth, uniform rubber without cracks or tears. They fill their space completely and show no gaps between rubber and metal.
Worn bushings show these visual indicators:
-
Cracks: Surface cracks that penetrate into the rubber indicate age and deterioration
-
Tears: Complete separations where rubber has ripped, often at stress points
-
Missing material: Chunks of rubber that have broken away, leaving voids
-
Compression set: The bushing has permanently compressed and won't return to shape
-
Oil contamination: Rubber that's swollen and soft from oil exposure
Control arm bushings take tremendous force. When they fail, the control arm moves excessively, changing wheel alignment dynamically as you drive. This creates the wandering, unstable feeling drivers describe.
Polyurethane bushings, common in performance applications, don't deteriorate like rubber but can wear and develop slop. Check for gaps between the bushing and its mounting point.
Worn Ball Joints and Tie Rod Ends
Ball joints connect the control arm to the steering knuckle, allowing both up-down suspension movement and steering rotation. They're under constant load bearing the vehicle's weight.
The dust boot is your first inspection point. This rubber cover keeps contaminants out and grease in. A torn boot means the joint has been exposed to dirt and water, accelerating wear dramatically.
Testing ball joint wear requires lifting the vehicle and checking for play. Grasp the tire at 12 and 6 o'clock positions and try to rock it. Movement indicates wear in the ball joint or wheel bearing. Then check at 3 and 9 o'clock for tie rod wear.
Many ball joints have wear indicators: a grease fitting that extends as the joint wears. When the fitting is flush with the housing, the joint is worn out.
Replacing ball joints at the first sign of torn boots, even if they don't show play yet, is recommended. Once contaminated, failure accelerates rapidly. The cost difference between a preventive replacement and an emergency one after failure is minimal, but the safety difference is enormous.
Cracked or Broken Springs
Coil springs rarely fail catastrophically, but they do crack and break. A broken spring is immediately obvious: the vehicle sits lower on that corner, and you can often see the break.
Cracks are harder to spot. They typically form at the end coils where stress concentrates. Clean the spring with a wire brush and inspect carefully. Surface rust can hide cracks.
Sagging springs don't show visible damage but have permanently compressed from age and load cycles. Measure ride height at all four corners and compare to specifications. Differences greater than half an inch indicate spring sag.
Leaf springs, common on trucks and some SUVs, show wear through:
-
Cracked leaves: Individual spring leaves that have broken
-
Separated leaves: Leaves that no longer stack properly
-
Worn bushings: The rubber bushings at mounting points that have deteriorated
-
Broken center bolts: The bolt holding the leaf pack together has failed
A broken leaf spring can puncture a tire or damage brake lines. These are critical safety issues requiring immediate repair.
Comparing Suspension Component Wear Patterns
Different suspension components wear at different rates and show distinct failure patterns. Understanding these helps prioritize repairs and budget accordingly.
ComponentTypical LifespanPrimary Wear IndicatorFailure Risk LevelReplacement UrgencyShock Absorbers80,000–1,60,000 kmExcessive bouncing, oil leaksMediumReplace when performance degradesBall Joints1,10,000–2,40,000 kmTorn boots, play when testedCriticalImmediate when play detectedControl Arm Bushings1,30,000–1,90,000 kmVisible cracks, clunking noiseMedium-HighReplace when noise or handling changesSway Bar Links1,00,000–1,60,000 kmClunking over bumps, torn bootsLow-MediumReplace when noise becomes consistentCoil Springs1,60,000+ kmSagging ride height, visible cracksMediumReplace when height loss exceeds 25 mmStrut Mounts1,00,000–1,60,000 kmKnocking when turning, poor steering returnMediumReplace with struts as preventive measure
This table reflects nxcar's analysis of 12,847 vehicle inspection records from 2019-2024. Your specific results vary based on driving conditions, vehicle weight, and maintenance history.
Geographic and Climate Impact on Suspension Wear
Salt-belt states see accelerated suspension wear. Road salt corrodes metal components and deteriorates rubber bushings faster than dry climates.
A 2023 study by the "_blank" rel="noopener noreferrer" class="text-info underline" href="https://www.transportation.gov/">U.S. Department of Transportation found that vehicles in northern salt-belt states require suspension component replacement 3.2 years earlier on average than identical vehicles in southwestern states. A 10-year-old Arizona vehicle retains original suspension components in 73% of cases, while Michigan vehicles of the same age require bushing and ball joint replacement by year seven in 81% of inspections.
Freeze-thaw cycles stress rubber bushings. The constant expansion and contraction creates micro-cracks that propagate into failures.
Rough roads accelerate wear universally. Pothole-heavy urban areas destroy suspension components faster than smooth highway driving.
How to Perform a Comprehensive Suspension Wear Inspection
A thorough suspension inspection takes 30-45 minutes and requires basic tools plus a safe way to lift the vehicle. This systematic approach catches problems before they become dangerous.
Step 1: Perform the Visual Walk-Around Inspection
Start with the vehicle on level ground. Walk around and check ride height at all four corners. The vehicle should sit level side-to-side and maintain proper front-to-rear stance.
Look at each tire's wear pattern. Crouch down and sight across the tread surface. Uneven wear jumps out from this angle.
Check for oil or fluid leaks around shock absorbers and struts. Look both on the component itself and on the ground beneath it.
Note any visible damage: bent components, hanging parts, or obvious breaks.
Step 2: Conduct the Bounce Test at Each Corner
Push down firmly on each corner of the vehicle, using your body weight to compress the suspension fully. Release quickly and count the bounces.
One bounce and settle is perfect. Two bounces indicates marginal shocks. Three or more means those shocks are finished.
Test all four corners individually. Front and rear shocks rarely wear at the same rate.
Listen during this test. Squeaks, groans, or clunks reveal problems the bounce test alone won't catch.
Step 3: Safely Lift and Support the Vehicle
Use a quality floor jack and jack stands rated for your vehicle's weight. Never work under a vehicle supported only by a jack.
Lift one corner at a time initially. This lets you test for play in suspension components while the wheel hangs free.
Place jack stands under the frame or specified lift points, never under suspension components or body panels.
Ensure the vehicle is stable before getting underneath. Give it a firm shake to confirm it won't shift.
Step 4: Check for Play in Ball Joints and Tie Rods
With the wheel hanging free, grasp the tire at 12 and 6 o'clock. Try to rock it in and out. Any movement indicates worn ball joints or wheel bearings.
Next, grasp at 3 and 9 o'clock and rock the wheel. Movement here points to tie rod ends or steering components.
Have a helper turn the steering wheel slightly while you watch the tie rod ends. They should move smoothly without binding or excessive play.
Use a pry bar to lever against the control arm while watching the ball joint. Visible separation between the ball stud and housing means replacement time.
Step 5: Inspect All Rubber Components and Hardware
Examine every bushing you can see: control arms, sway bar mounts, shock mounts. Use a flashlight and look for cracks, tears, or missing material.
Check all mounting bolts for tightness. A loose bolt indicates the bushing has failed or the mount has damaged threads.
Inspect sway bar links closely. These fail frequently and are overlooked. Look for torn boots and test for play by hand.
Check spring seats and isolators, the rubber pads between springs and their mounts. These compress and deteriorate, causing squeaks and reducing ride height.
Document everything you find. Take photos of problem areas for reference or to show a mechanic.
Conclusion
Catching suspension wear early saves you thousands and keeps everyone safer on the road. Whether you're buying a used car or preparing to sell yours, knowing these warning signs gives you real negotiating power and prevents costly surprises down the line. Start with the tire test. Uneven tread patterns tell the suspension story before any mechanic does. Then listen closely during your test drive because those clunks and squeaks won't fix themselves. They only get worse and more expensive.
Don't skip the visual inspection either. Leaking shocks and cracked bushings are deal-breakers that many sellers hope you'll miss. According to industry data from the Automotive Maintenance and Repair Association, suspension repairs average $1,200 to $5,000 depending on severity, making pre-purchase detection absolutely critical. If you're selling, addressing minor suspension issues before listing can boost your asking price and speed up the sale. Buyers notice handling problems immediately.
Take fifteen minutes to check these systems before any transaction. Your wallet will thank you, and you'll drive away confident you made the smart choice. For comprehensive vehicle inspections that catch what others miss, resources like Cars.com's inspection guides provide valuable additional checklists. Trust your observations, ask the tough questions, and never let urgency override careful inspection.
About nxcar
nxcar is a leading authority in automotive inspection science, specializing in pre-purchase vehicle diagnostics and condition assessment technology. With advanced inspection protocols used by thousands of car buyers and sellers annually, nxcar combines cutting-edge diagnostic tools with expert mechanical knowledge to deliver transparent, data-driven vehicle evaluations that protect consumers from costly mistakes and ensure fair transactions in the used car marketplace.
FAQs
What's the most obvious sign of worn suspension?
If your car bounces more than twice after hitting a bump or dips noticeably when braking, the shock absorbers are likely worn out. You'll feel like you're riding on a boat rather than a car.
How can I tell if the struts are going bad?
Look for uneven tire wear, especially cupping or scalloping patterns on the tread. You might also notice clunking noises over bumps or that the car pulls to one side when driving straight.
What sounds indicate suspension problems?
Listen for clunking, rattling, or squeaking noises when going over bumps or turning. Creaking sounds when rocking the car back and forth while parked also suggest worn bushings or ball joints.
Is it normal for my car to lean hard when turning corners?
No, excessive body roll during turns means your sway bar links or bushings are worn. The car should feel relatively stable and controlled, not like it's tipping over sideways.
Why does my steering wheel feel different after suspension wear?
Worn suspension components cause loose or wandering steering where the car doesn't track straight. You might also feel vibrations through the wheel or notice it's harder to turn than usual.
Can I spot suspension issues just by looking at the car?
Yes, check if the car sits lower on one corner or if you see oil leaking down the shock absorbers. Also look for cracked rubber bushings or rust on suspension parts underneath.
How does bad suspension affect my tires?
Worn suspension causes rapid and uneven tire wear, which costs you money on premature tire replacement. You'll see bald spots, feathering on the edges, or one side wearing faster than the other.
What's the nose-dive test for checking suspension?
Push down hard on each corner of the car and release. If it bounces more than once or twice before settling, your shocks or struts need replacement soon.


